Managing unit move-in jobs
Storeganise allows you to manage unit move-ins through the Management portal. From here, you can schedule, assign, track, and complete move-ins.Note: If Automation settings are enabled (Sites → Advanced settings → Automation), the system will automatically confirm, invoice, charge, and complete move-ins after submitting the job. If disabled, all steps must be performed manually by a manager.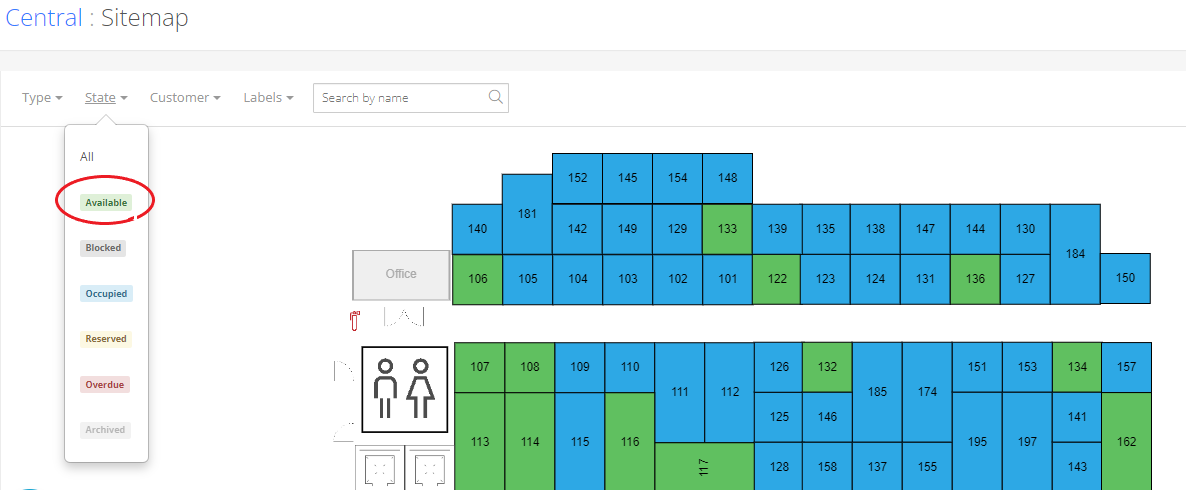 Once you select the available unit for the move-in, click on Schedule move-in.
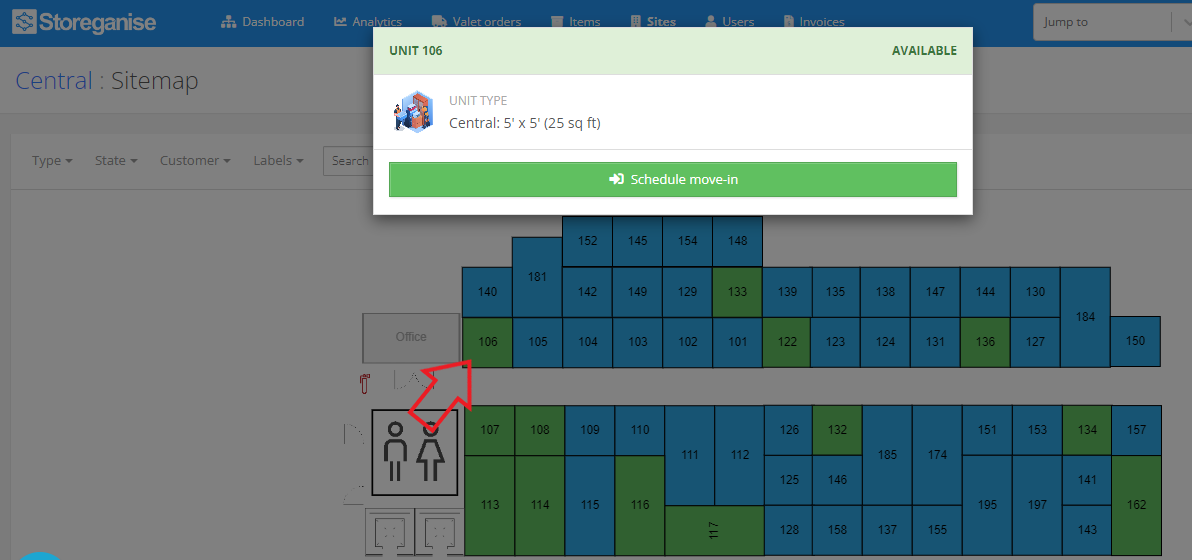 Next, in the Schedule move-in window, fill out the following fields:
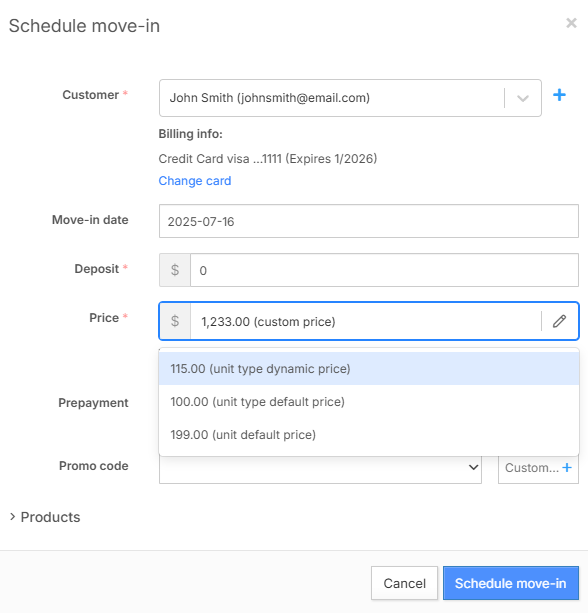
 Once the invoice is marked as paid, click on the ✔️ Continue button to move to the next step.
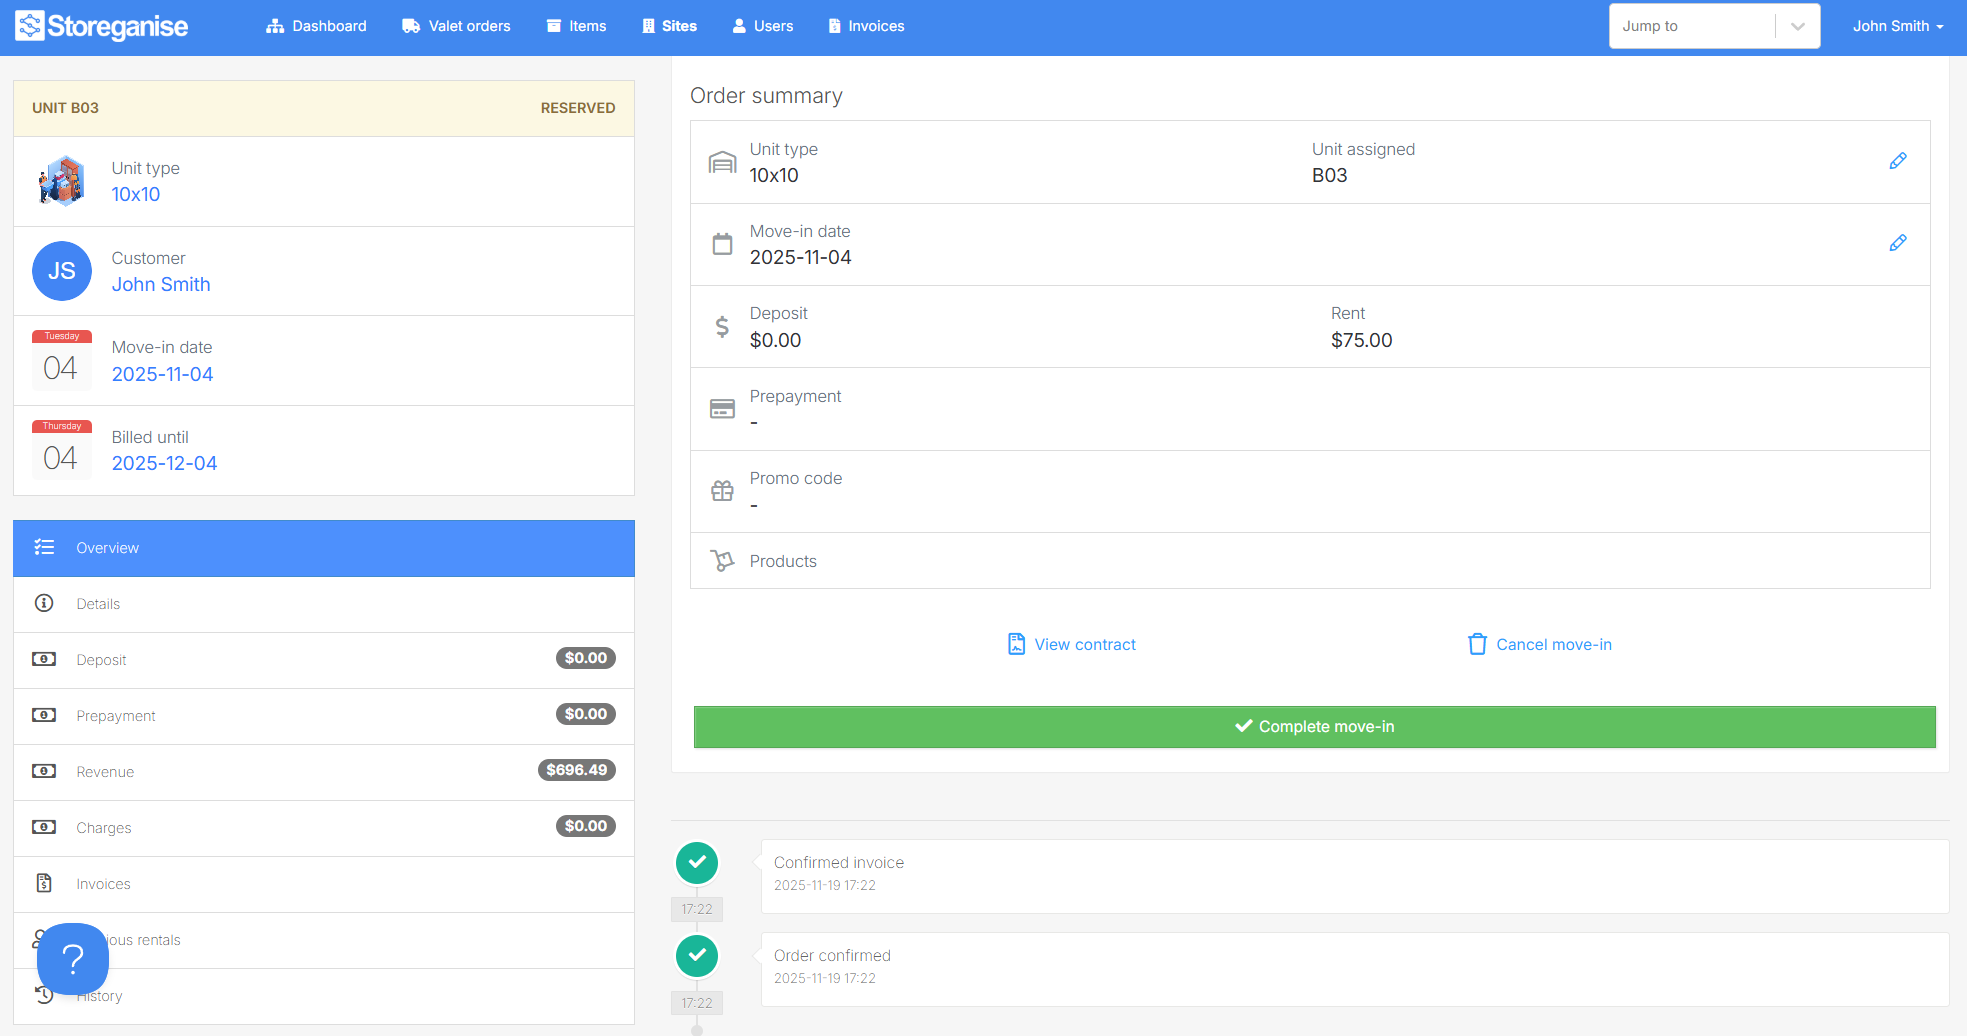

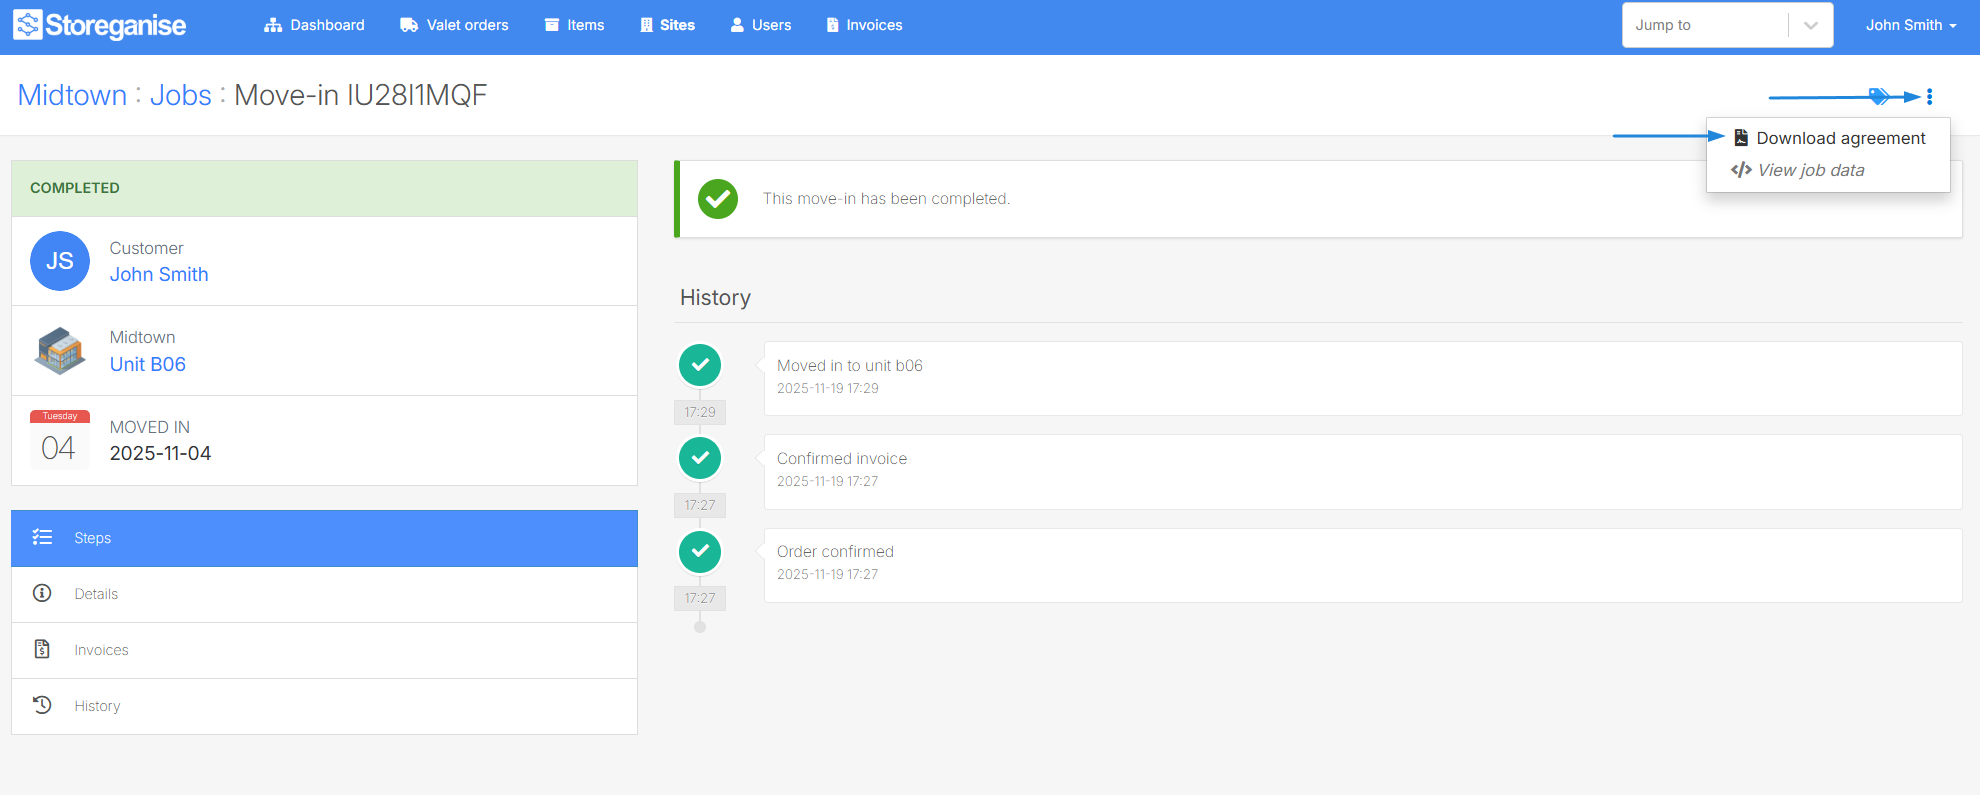 In all cases, the PDF will open in a new window where you'll be able to print or save the file.The agreement template will follow the agreement template setup for the corresponding site as per the Site settings.
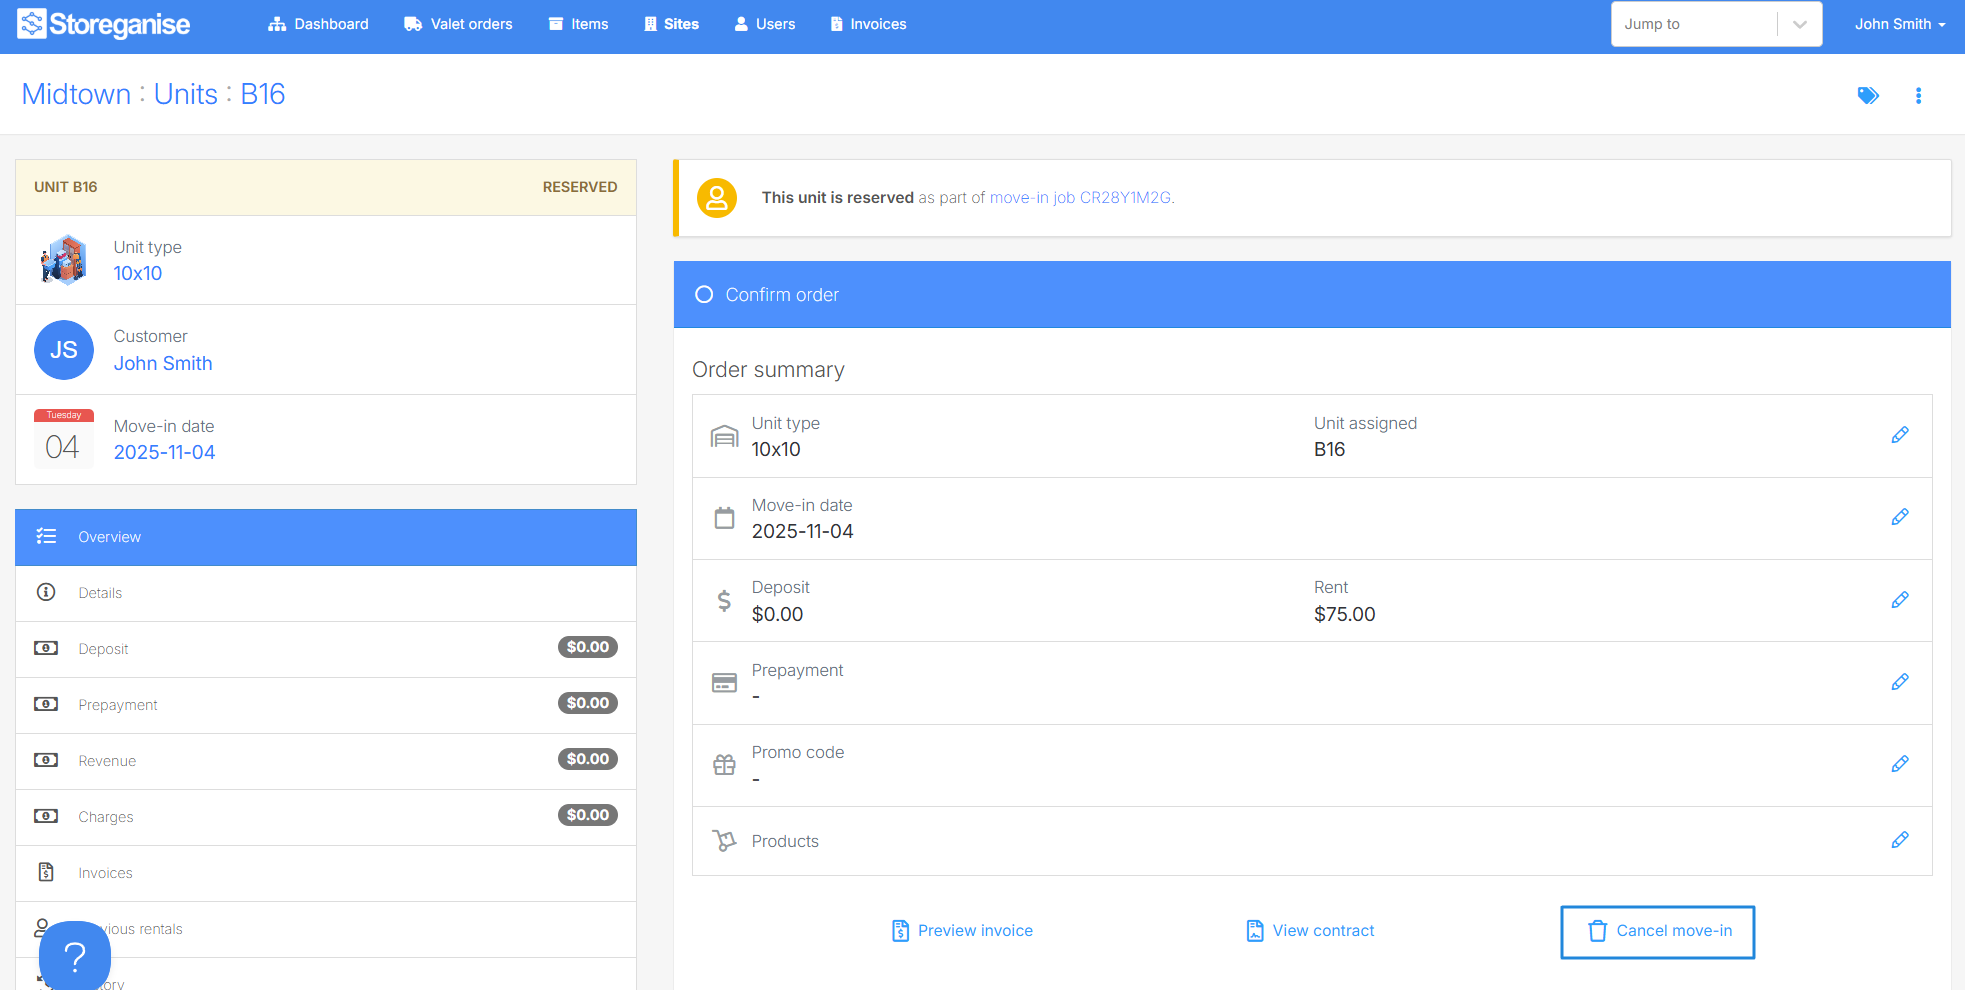 Once cancelled, the reserved unit will be made Available again.
Creating a Move-in job
Move-in jobs can be created in 3 ways: by staff through the Management Portal and Unit Page or by the customer through the Customer Portal.From the Management portal (Sitemap)
You can move a customer into a unit by clicking on an available unit in the sitemap or by navigating to an available unit page.- Customer – Select an existing customer from the list, or click the + icon to create a new customer account.
- Move-in date – Choose the date the tenant will move in.
- Deposit – Enter the deposit amount to be collected if required.
- Price– Select which price to apply for this booking:
- Dynamic price – If applicable, the latest dynamically calculated price for the unit type.
- Unit type price – The default price for the selected unit type.
- Unit price – The default price for the specific unit.
- Custom price – Manually enter a specific value.
- Pre-payment – Select the pre-payment period if required (e.g., 1 month).
- Promo code – Apply an existing promo code or add a custom one if needed.
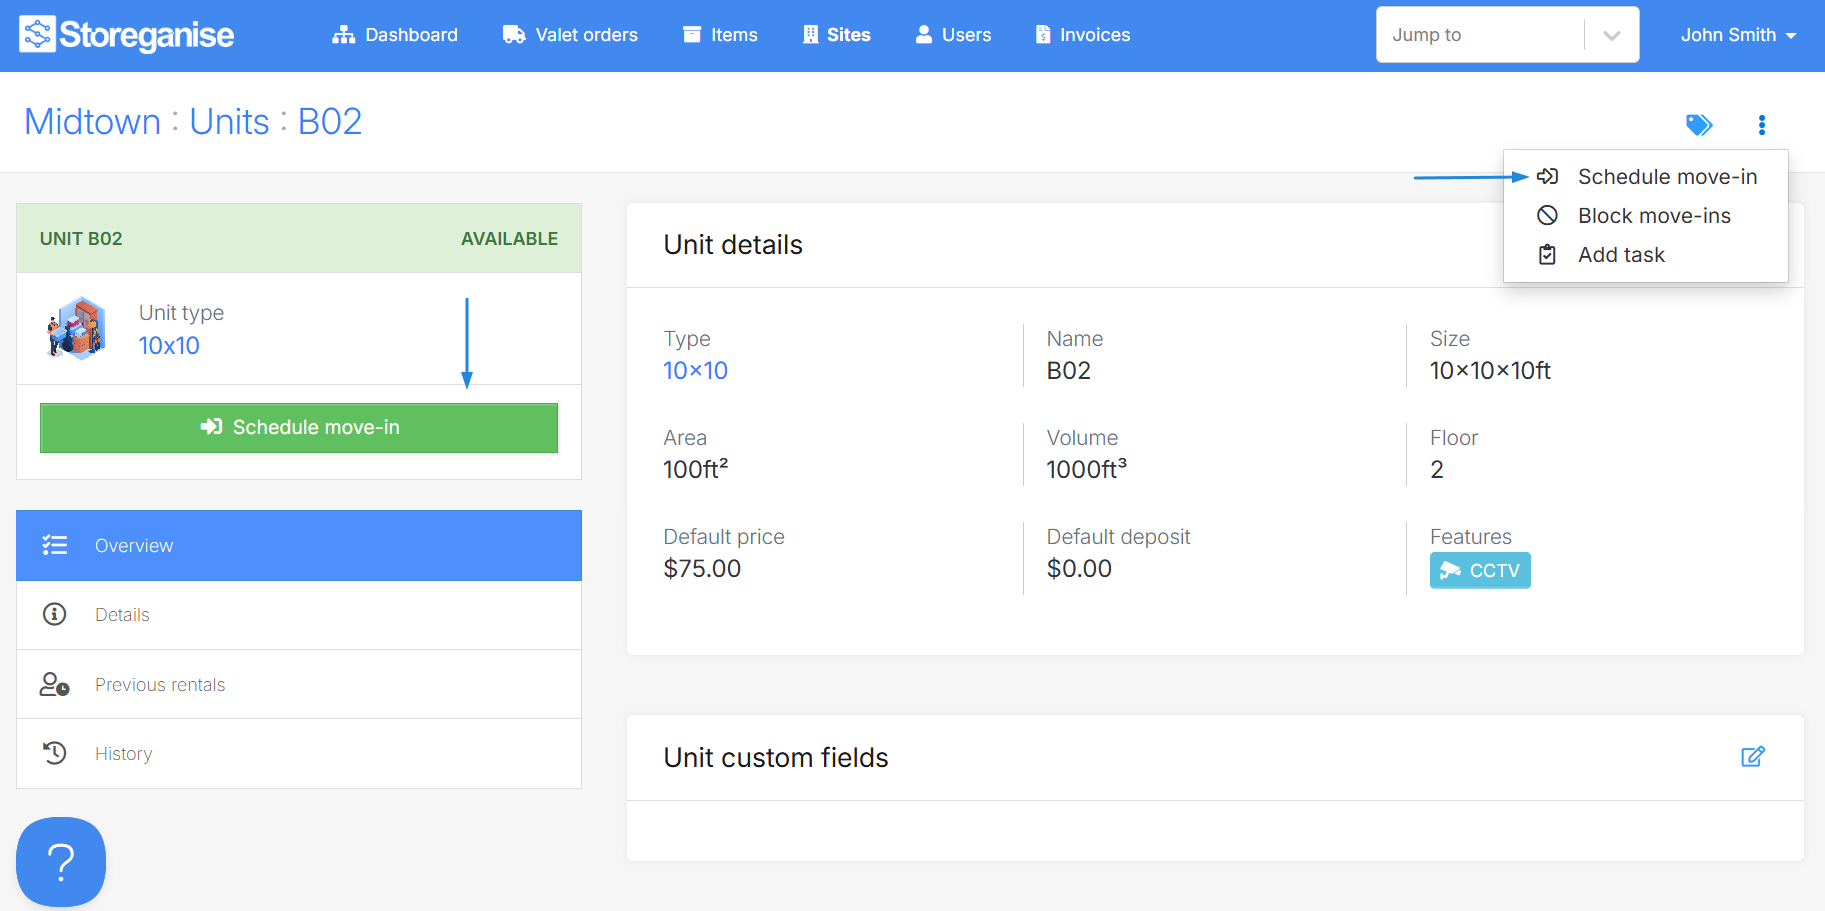
From the Unit page
Manually move a customer into a unit click on the three dots on the top right of the unit page then select Schedule move-in. Next you may either select to move-in an existing customer or add the details for a new customer.From the Customer portal
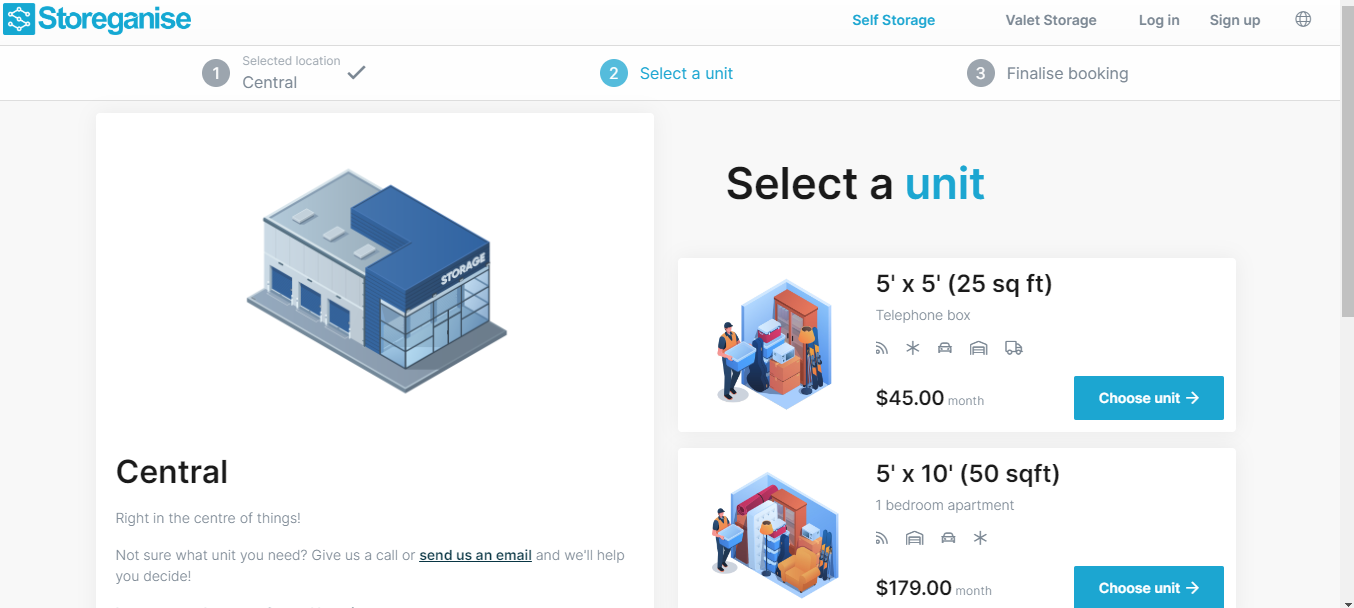
Move-in jobs are created by customers when booking through the Customer PortalConfirm reservation
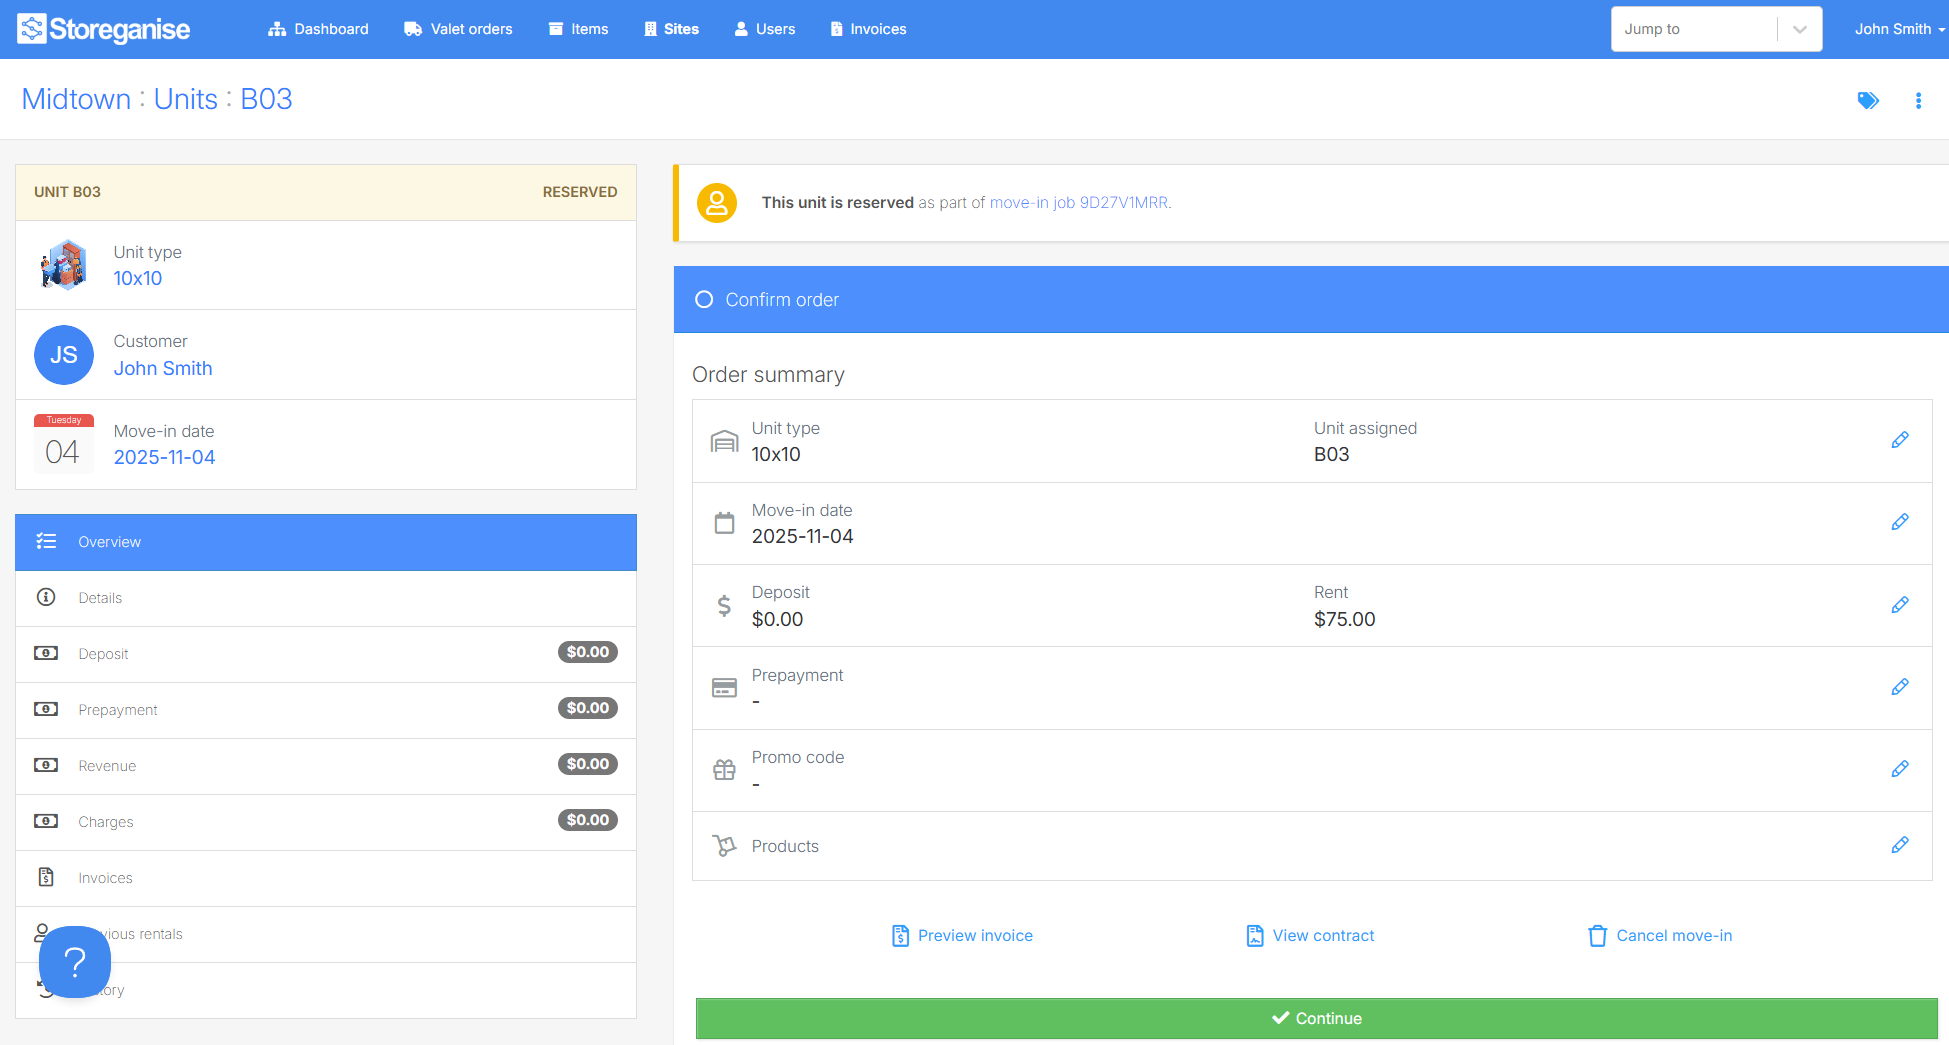
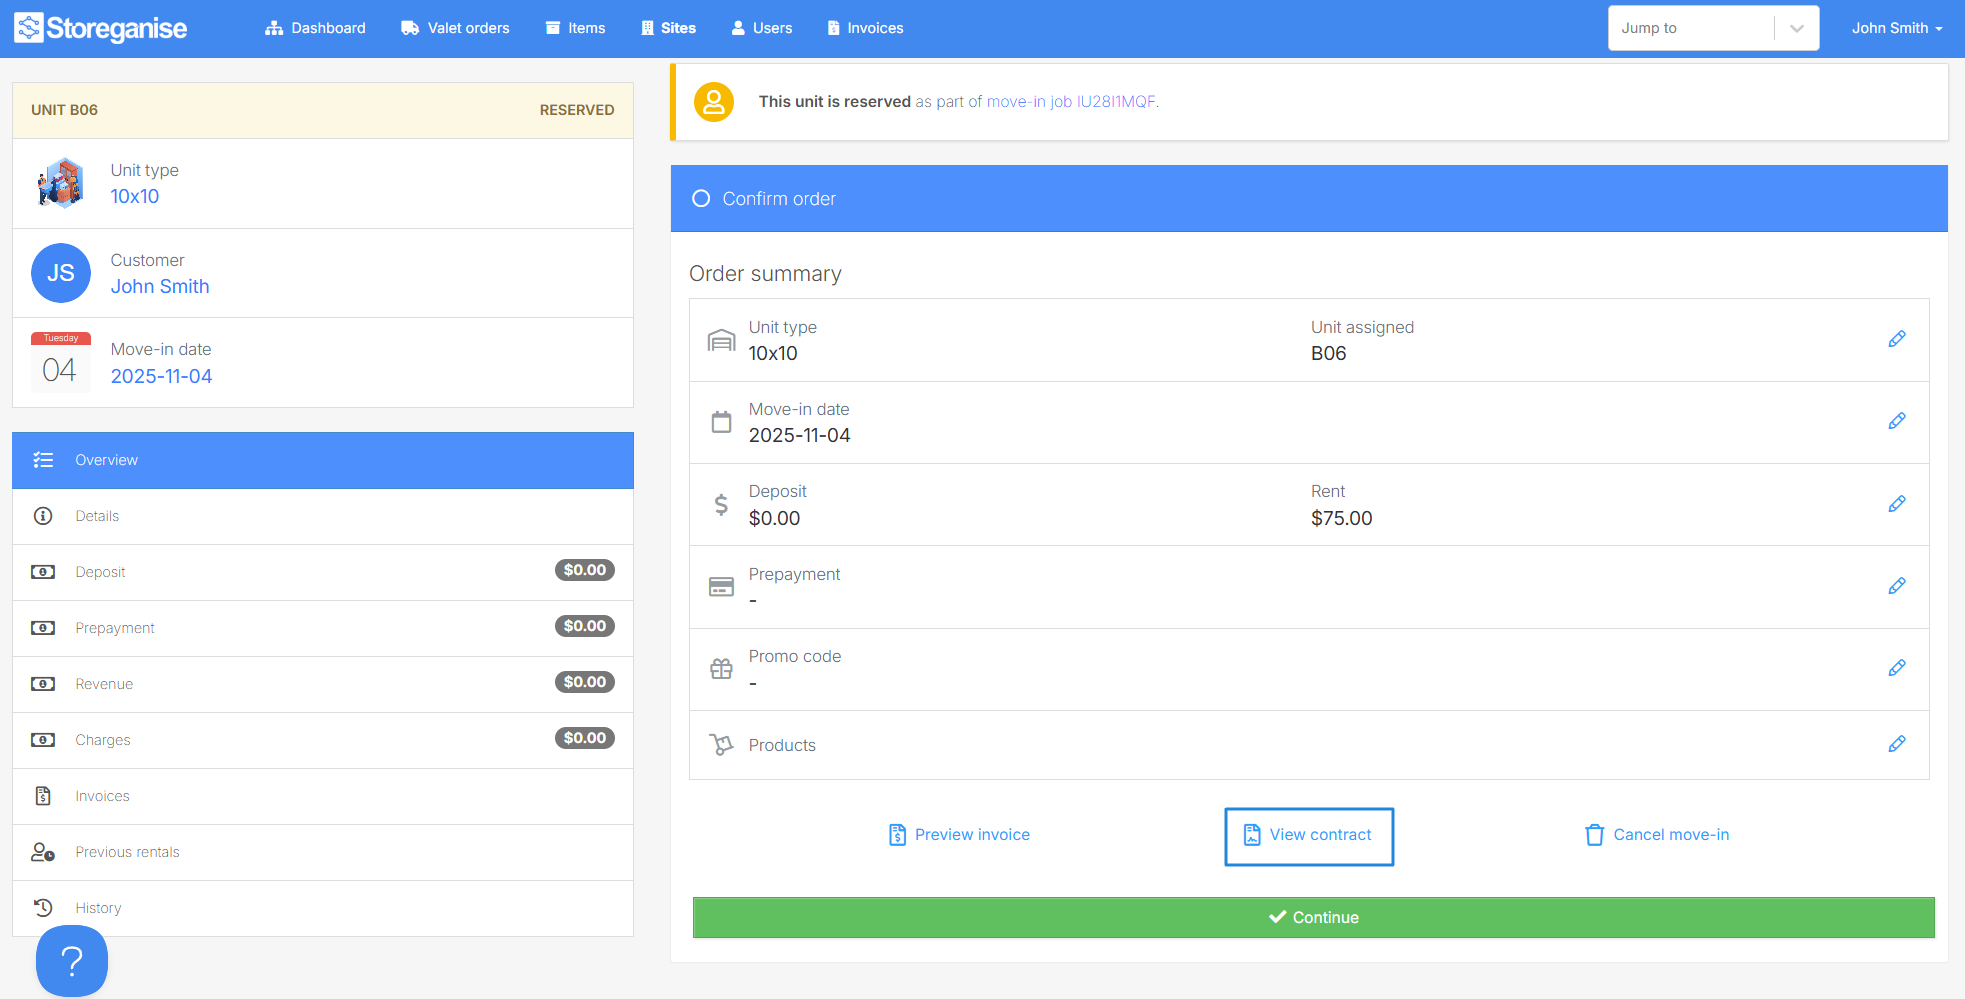
Once a unit has been reserved, the next step is to review and confirm the reservation.This step will show a summary of the reservation, including the reserved unit, deposit & rent, prepayment, move-in date, etc. Edits can be made to the details or reserved units.Once all details are confirmed, click ✔️ Continue.
Check and charge an invoice
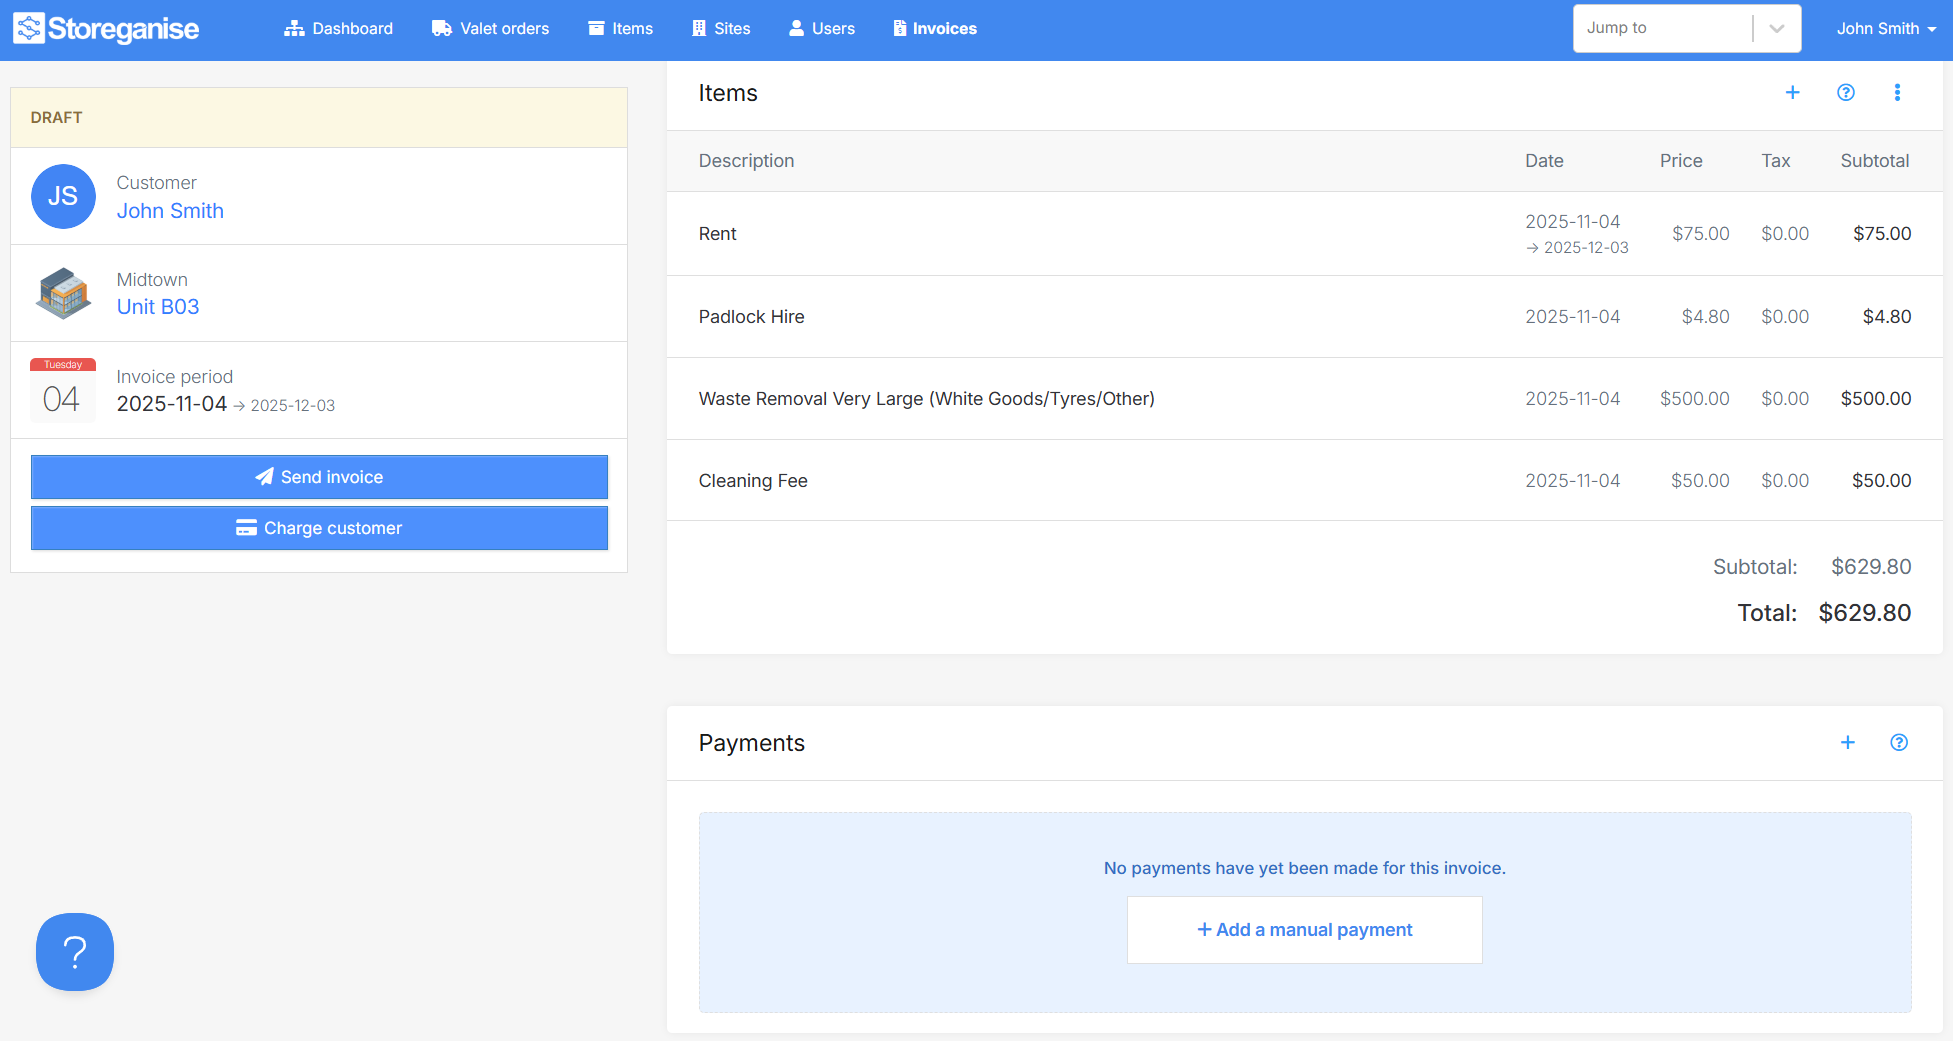
In this step, the system will generate the invoice for the customer including the number of months that are being pre-paid and any pre-set charges that are set for the unit type in the Unit settings.Click on the invoice line to go to the invoice page where you can charge the customer, send the invoice/receipt or manually mark a payment against the invoice.Editing and adding invoice items
The invoice can be edited directly within the unit order by clicking on a line item (or you can do this from within the invoice page). To add additional line items to the invoice, click on the + Add item and enter the details in the pop-up window (or you can do this from within the invoice page).Confirm move-in
The final step in a unit order is the move-in step. Click on ✔️ Complete move-in to finalize the unit order. At this point, the unit state will be updated from Reserved to Occupied.Accessing the rental agreement
You can access the rental agreement for a unit rental in a few different ways during and after the move-in process.- When the move-in job is Pending
- After the move-in is Completed
Cancel order
If you need to cancel a unit order, click on Cancel move-in.Jump to