Customizing invoice emails in Storeganise
Overview
Storeganise has several automated email functions which are managed in the main settings of the admin portal. These emails can be customized to fit your needs. They are built as general templates that pull placeholder information so each email is automatically personalized to the customer and user it is being sent to. This article will focus on how to utilize these features to customize your invoice-related emails.You will find these templates in the Main Settings of your admin portal under the Emails section. Simply click on one of the emails here to open the window where you will edit the layout and content of the email.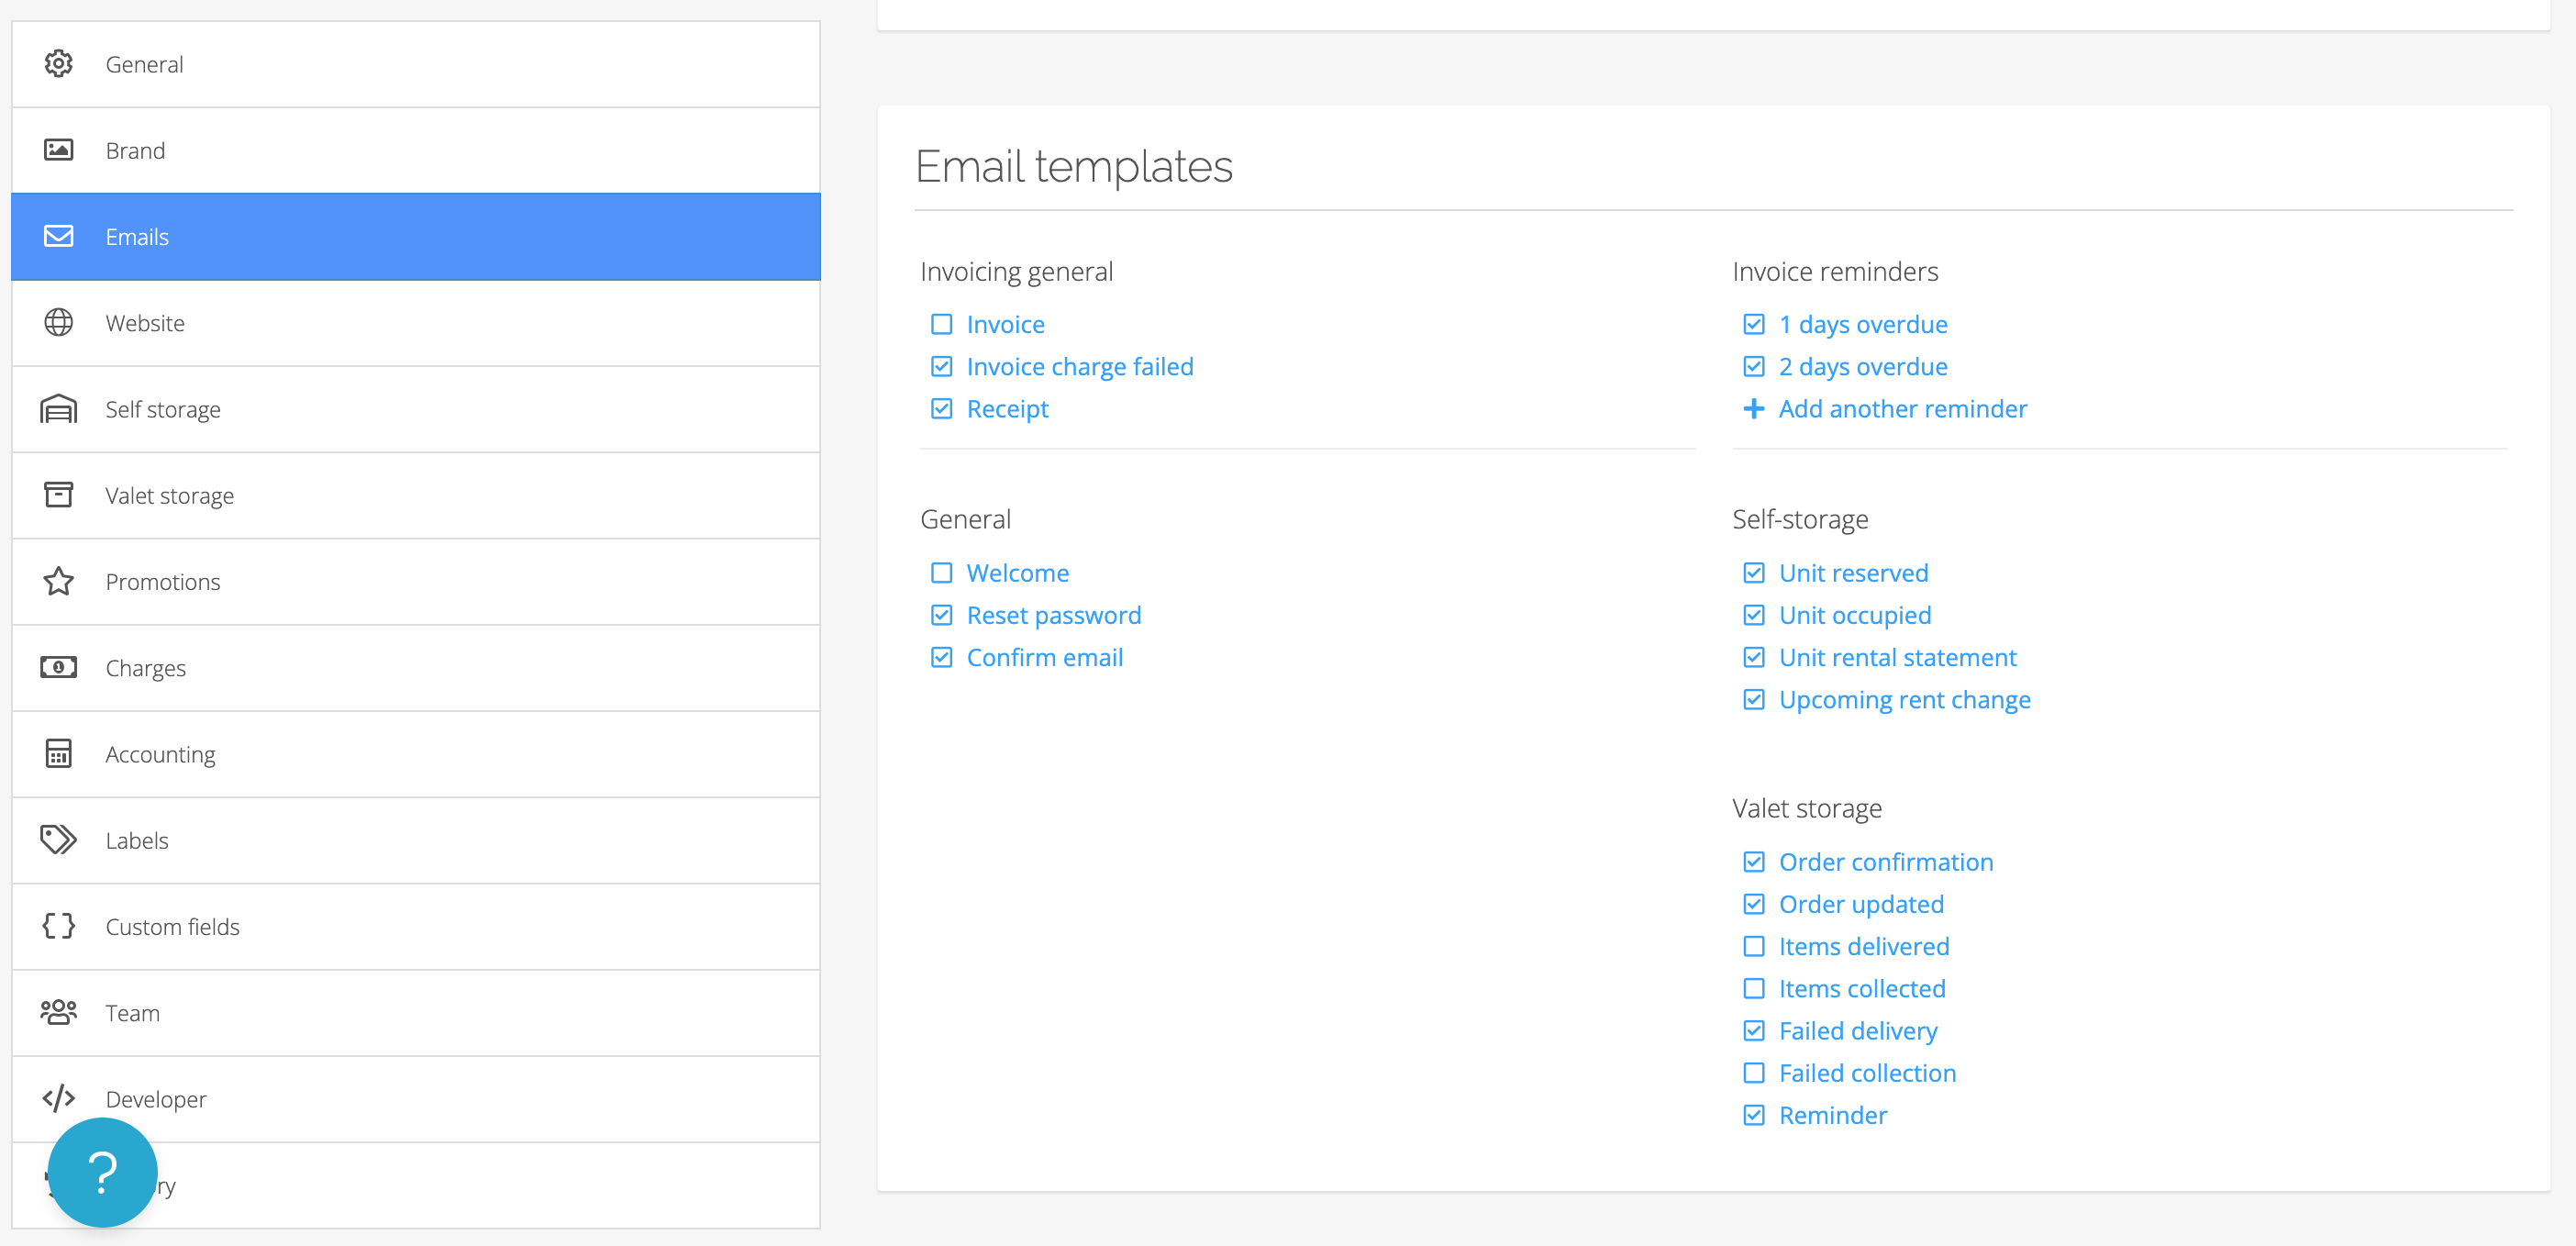
Using placeholders
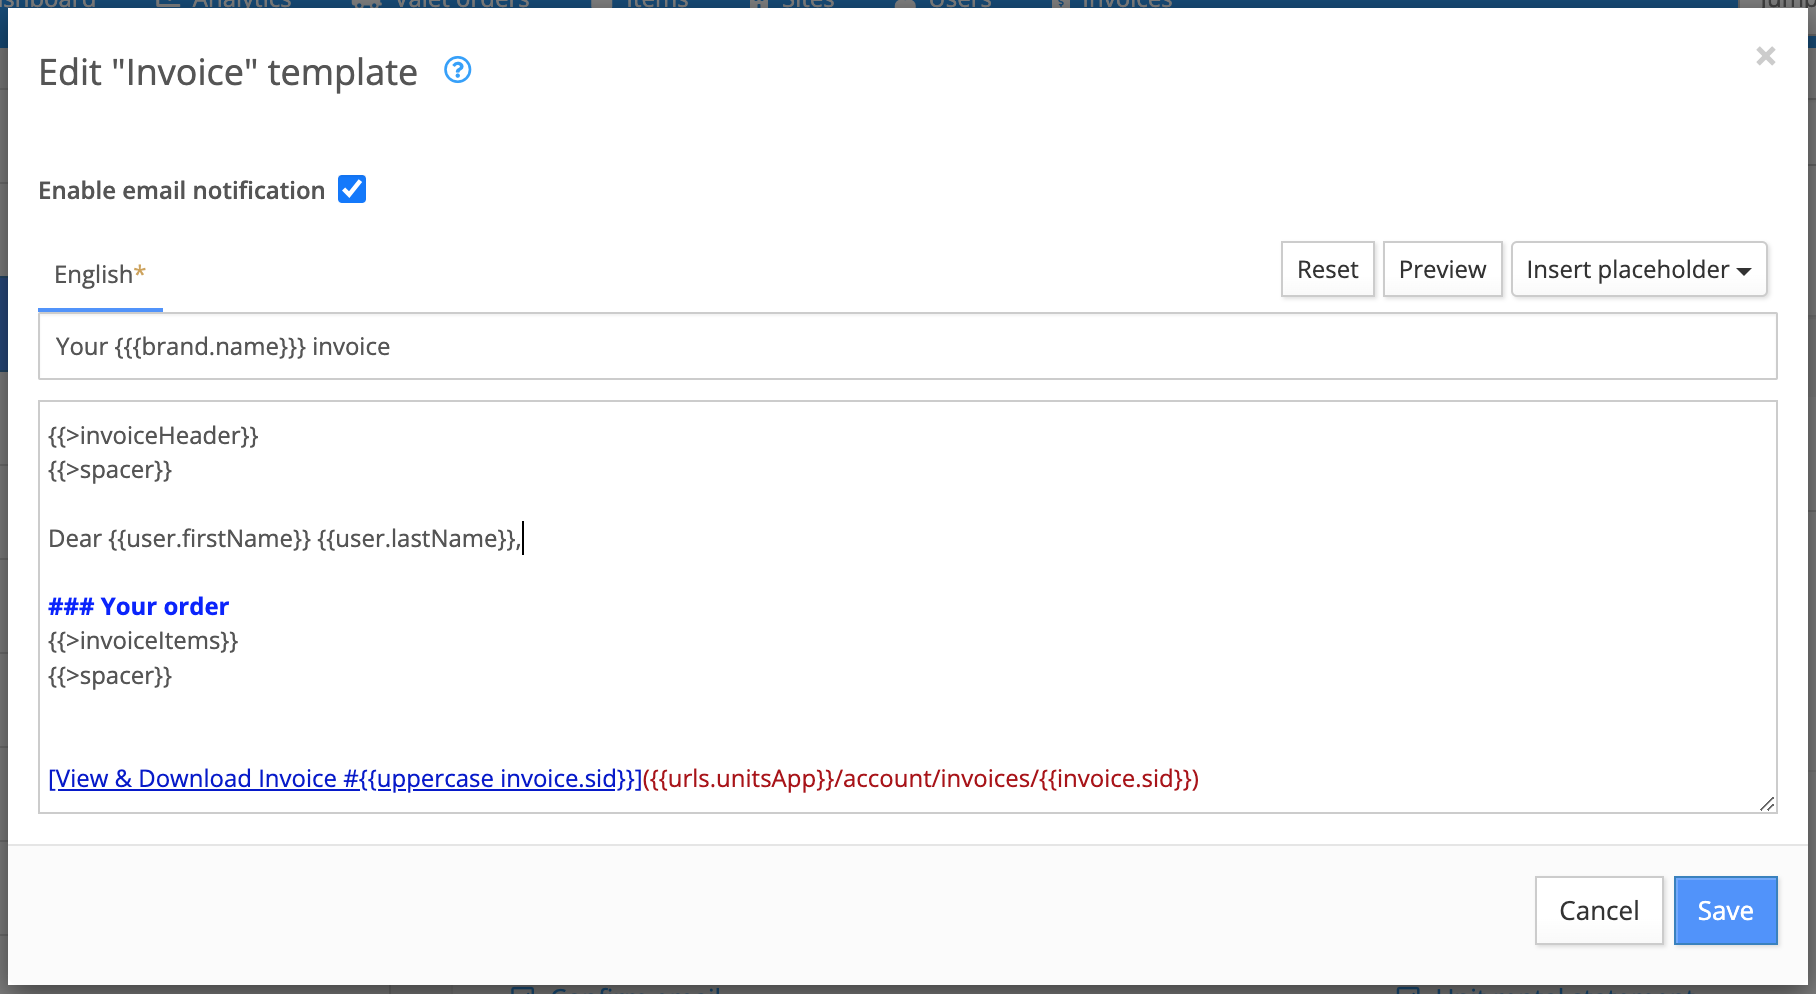
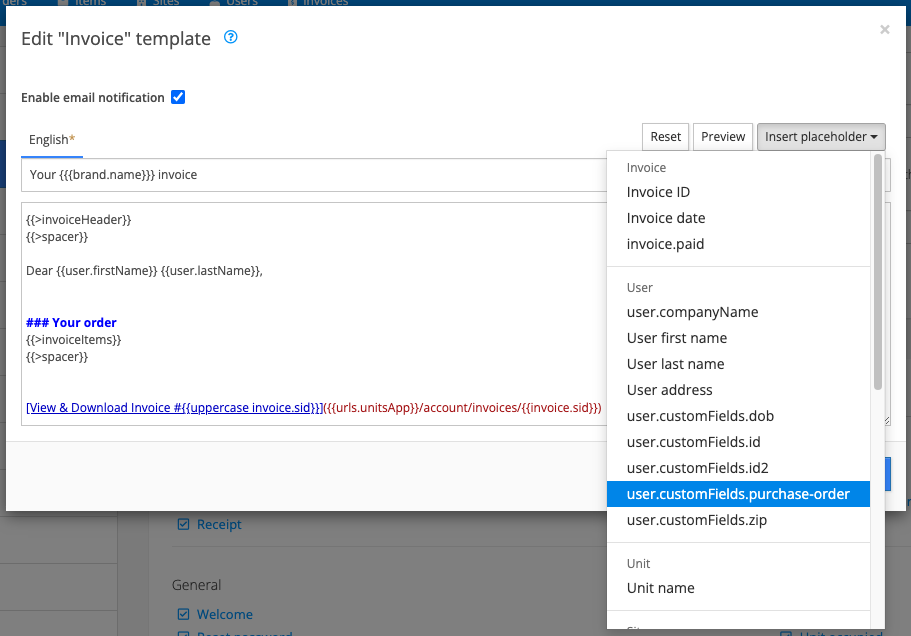
Placeholders in email templates pull recipient-specific data from the system. Default placeholders are available and can be selected in the 'edit template' window. Click 'Insert placeholder ▼' in the top right corner to see the list of default variables.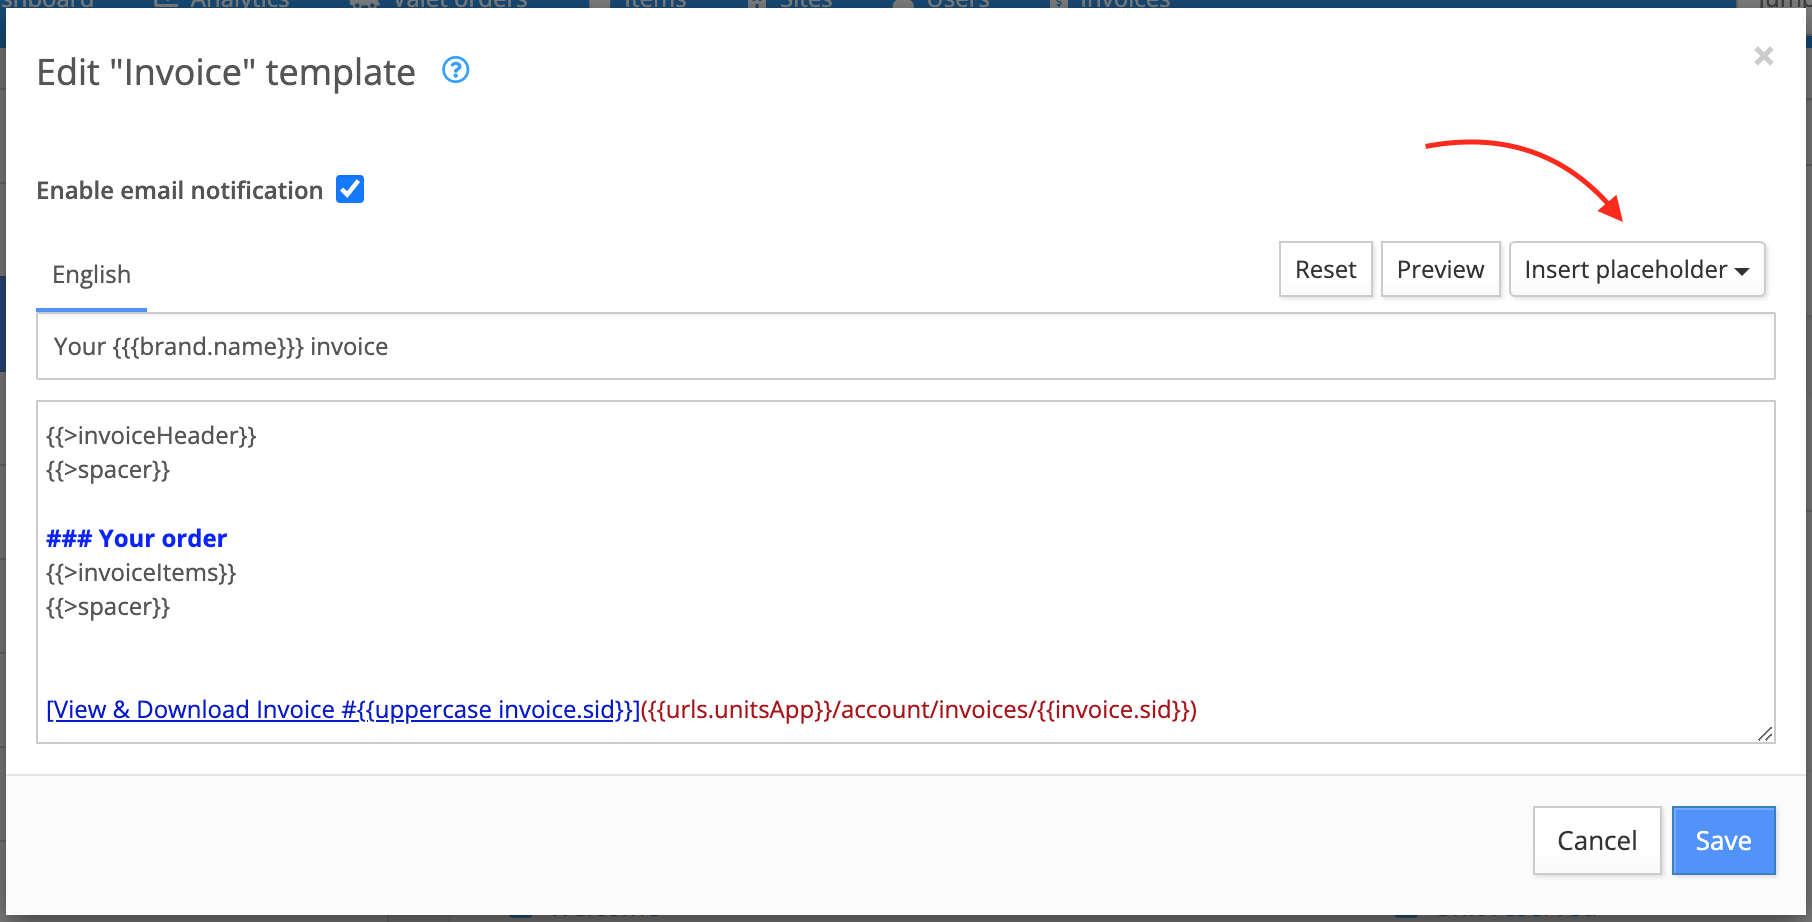
- {{user.firstName}} and {{user.lastName}}
Note: If you want to show dates in a short format, make sure that formatDate is added before {{invoiceCreated}} e.g. {{formatDate invoice.created}} .
Using custom fields
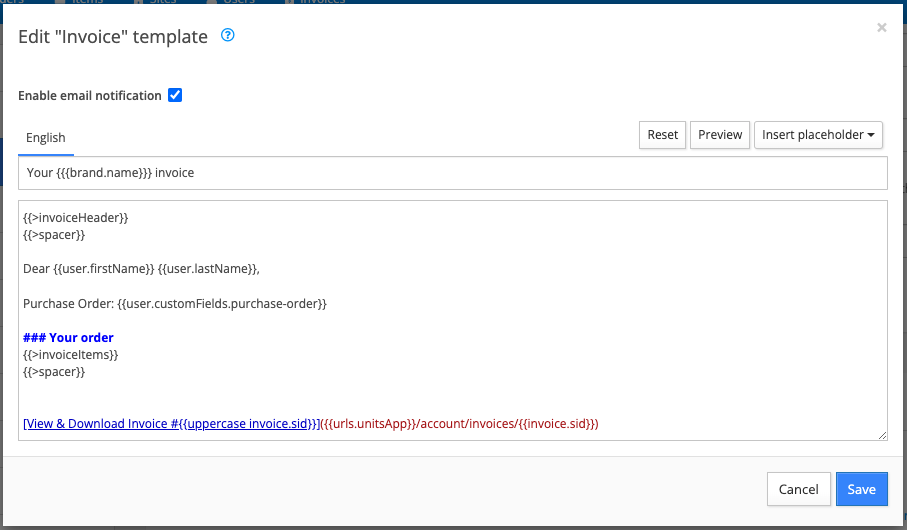
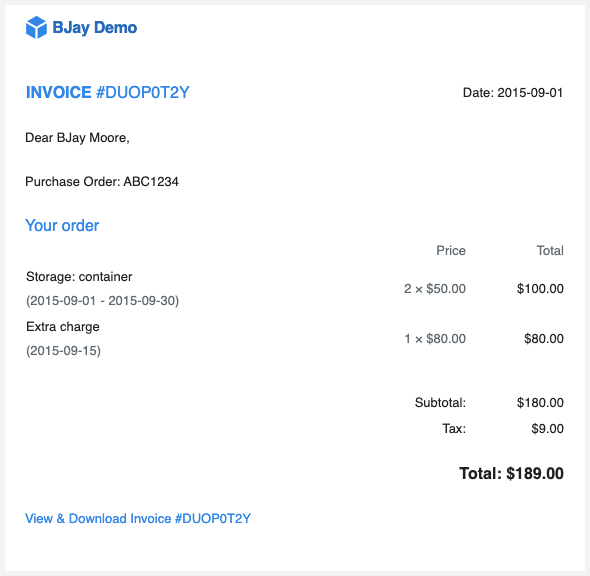
If you need to add non-native information to your invoices in Storeganise, you can use custom fields. These fields will be automatically added to the 'Insert placeholder▼' dropdown list in email template editing as you create them.Click here to view more information about creating and using custom fields.For example, if a customer needs to link Purchase Order numbers to invoice payments, create a custom field for this information. In this case, the custom field will be created at the user level.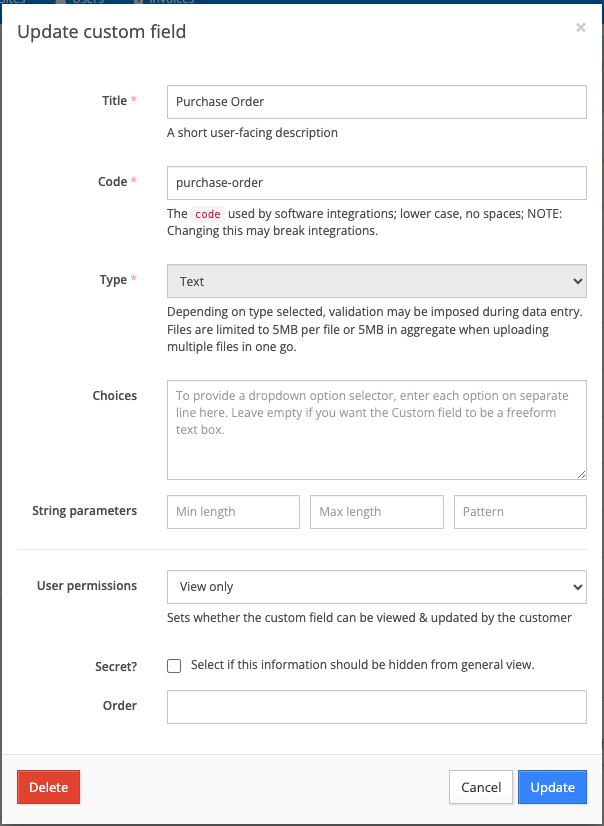
Note: In order to make custom fields appear as placeholders for email templates they must be viewable by users in the User permissions setting.

Advanced customization of invoice partials
If you need more control over the customization of the default invoice partials for the header and line items, the full HTML codes can be found below.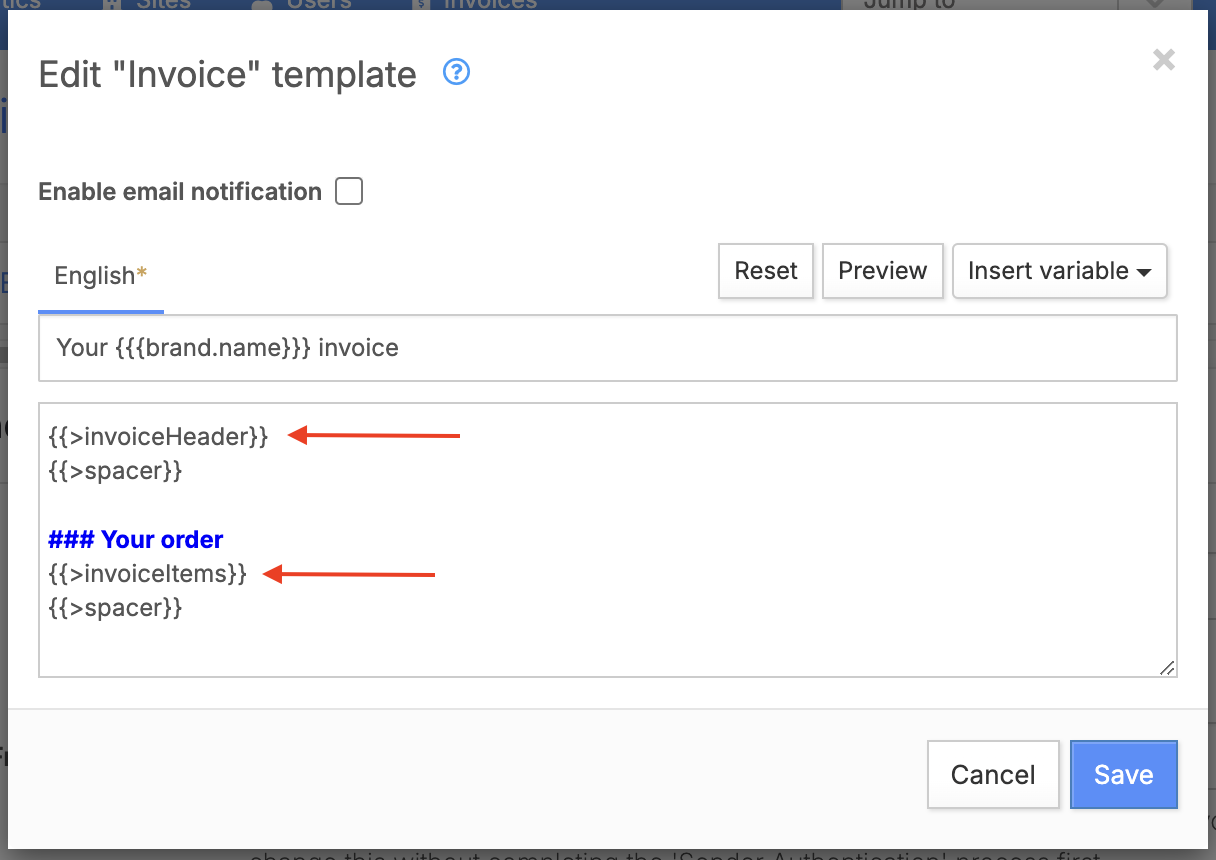
{{>invoiceHeader}} :<table width="100%" border="0">
<tr>
<td width="50%" style="font-size: 16px; vertical-align: top;">
<a href="{{urls.unitsApp}}/account/invoices/{{uppercase invoice.sid}}" style="color:{{brand.linkColor}}">
<strong>{{cmsText 'invoiceHeader.title'}}</strong> #{{uppercase invoice.sid}}
</a>
{{#ifInvoiceFailed}}
<br />
<strong style="color:#B94A48;font-size: 16px;">{{cmsText 'invoiceHeader.failed'}}</strong>
{{/ifInvoiceFailed}}
{{#ifInvoicePaid}}
<br />
<strong style="color:#60C060;font-size: 16px;">{{cmsText 'invoiceHeader.paid'}}</strong>
{{/ifInvoicePaid}}
</td>
<td width="50%" class="text-end" style="vertical-align: top;">
{{cmsText 'invoiceHeader.date'}}: {{formatDate invoice.startDate dateFormats.short}}
</td>
</tr>
</table>
{{>invoiceItems}} :<table width="100%">
{{#if unit.name}}
<tr>
<td colspan="3">
<h4 style="margin-bottom: 0">{{cmsText 'invoiceItems.unitHeader'}} {{unit.name}}</h4>
</td>
</tr>
{{/if}}
{{#if invoice.entries.length}}
<tr>
<td></td>
<td class="text-muted text-end">{{cmsText 'invoiceItems.price'}}</td>
<td class="text-muted text-end">{{cmsText 'invoiceItems.tax'}}</td>
<td class="text-muted text-end">{{cmsText 'invoiceItems.total'}}</td>
</tr>
{{#each invoice.entries}}
<tr>
<td>
{{desc}} <br/>
<span class="text-muted">
{{#if endDate}}
({{formatDatePeriod date endDate}})
{{else}}
({{formatDate date ../dateFormats.short}})
{{/if}}
</span>
</td>
<td class="text-muted text-end">{{#if qty}}{{qty}} × {{/if}}{{formatPrice amount}}</td>
<td class="text-muted text-end">{{#if tax}}{{formatPrice tax}}{{/if}}</td>
<td class="text-muted text-end">{{formatPrice total}}</td>
</tr>
{{/each}}
{{/if}}
<tr><td colspan="4"> </td></tr>
{{#if invoice.tax}}
<tr>
<td colspan="3" class="text-end">{{cmsText 'invoiceItems.subtotal'}}:</td><td class="text-end">{{formatPrice invoice.subtotal}}</td>
</tr>
<tr>
<td colspan="3" class="text-end">{{cmsText 'invoiceItems.tax'}}:</td><td class="text-end">{{formatPrice invoice.tax}}</td>
</tr>
{{/if}}
<tr>
<td colspan="4" class="text-end" style="font-size: 16px; padding-top:20px;"><strong>{{cmsText 'invoiceItems.total'}}: {{formatPrice invoice.total}}</strong></td>
</tr>
{{#ifNull invoice.amountPaid}}
{{else}}
<tr>
<td colspan="4" class="text-end" style="font-size: 16px; padding-top:6px;">{{cmsText 'invoiceItems.amountPaid'}}: {{formatPrice invoice.amountPaid}}</td>
</tr>
<tr>
<td colspan="4" class="text-end" style="font-size: 16px; padding-top:6px;"><strong>{{cmsText 'invoiceItems.amountDue'}}: {{formatPrice invoice.balance}}</strong></td>
</tr>
{{/ifNull}}
</table>
Adding a bank account for each site
- Go to your main settings.
- Navigate to the "Custom Fields" section and under the ''Site Custom Field'' section.
- Create a new custom field specifically for bank account information.
- Name this field clearly, such as “Bank Account Details” or something similar.
- Save your new custom field.
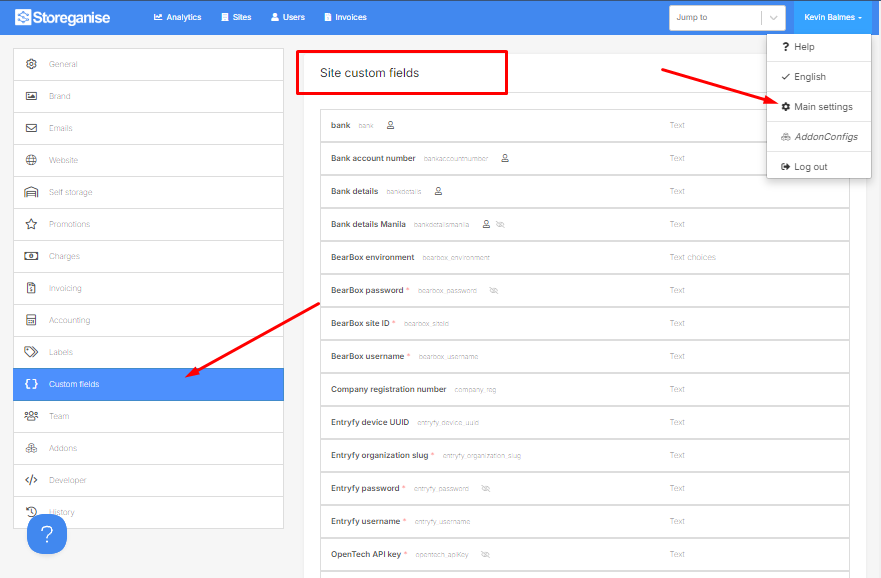
Note: To learn more about custom field settings, you can check this help document.
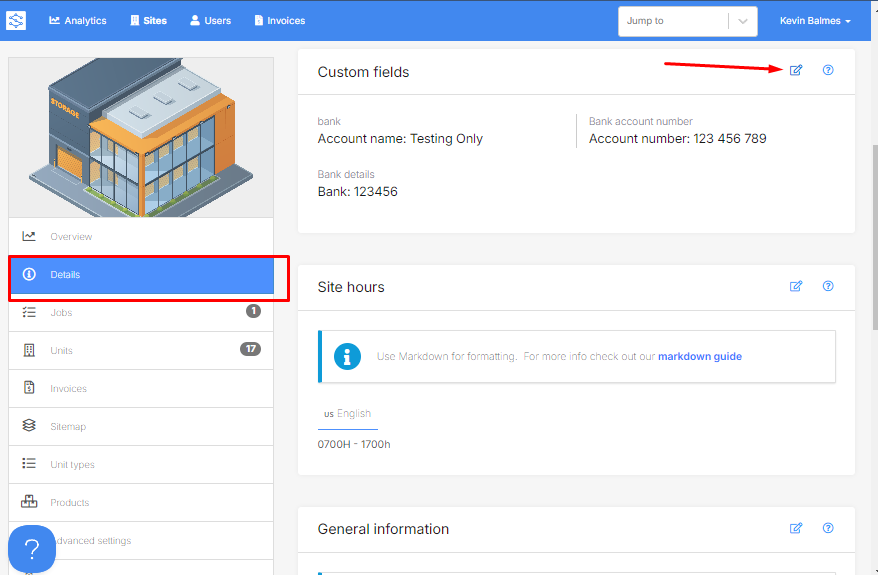
- For each site within your business, go to 'Details.'
- Find the section for custom fields.
- Assign the newly created "Bank Account Details" field to the site.
- Enter the correct bank account information for that specific site in the custom field.
- Repeat this process for all sites.
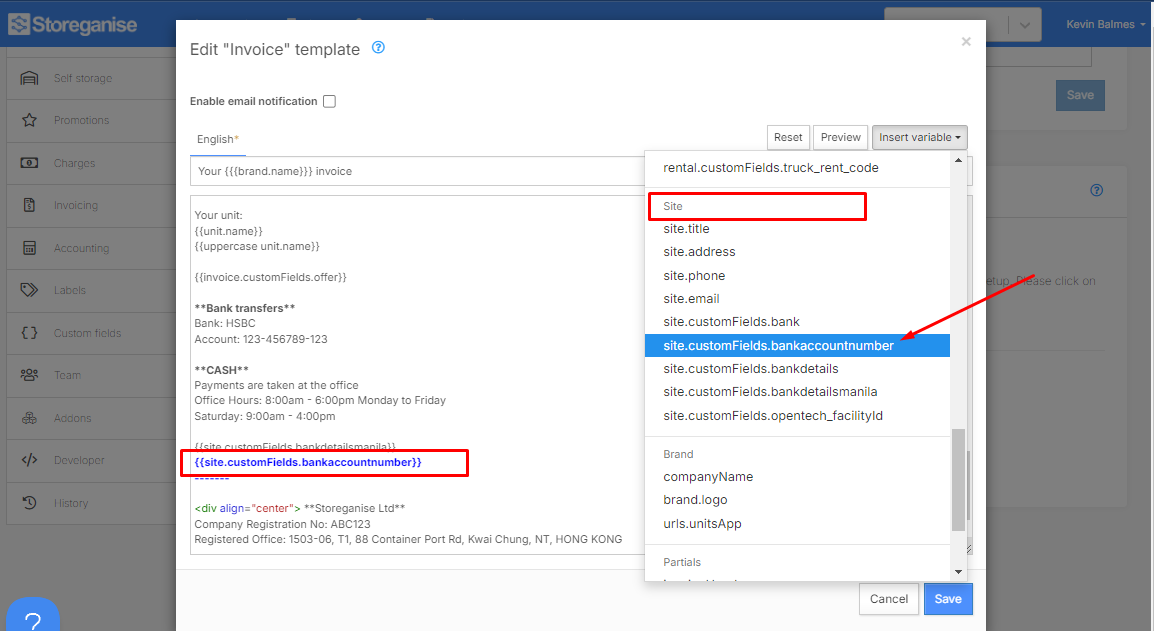
- Access your invoice email template, which is used across the entire business.
- Identify where the bank account details need to be displayed.
- Insert the placeholder for the custom field you created (e.g., {{Bank Account Details}}) into the appropriate location within the email template.
- Save the updated template.
Jump to
Related articles
Email settings
Billing / invoice related emails
Troubleshooting email delivery