Accepting payments in a custom booking app
How it works
The custom billing API sits as a gateway-agnostic layer on top of your installed payment Add-on — whether that's Stripe, Mollie, Bpoint, Fortis, or another provider. Your app calls a single set of endpoints regardless of which Add-on is in use. Storeganise handles the hosted checkout UI, tokenisation, and storage of payment details on the provider's side.There are two operations your app would usually support:- Registering a new payment method: redirect the customer to a hosted checkout page, which handles the entire flow and redirects back to your app when done.
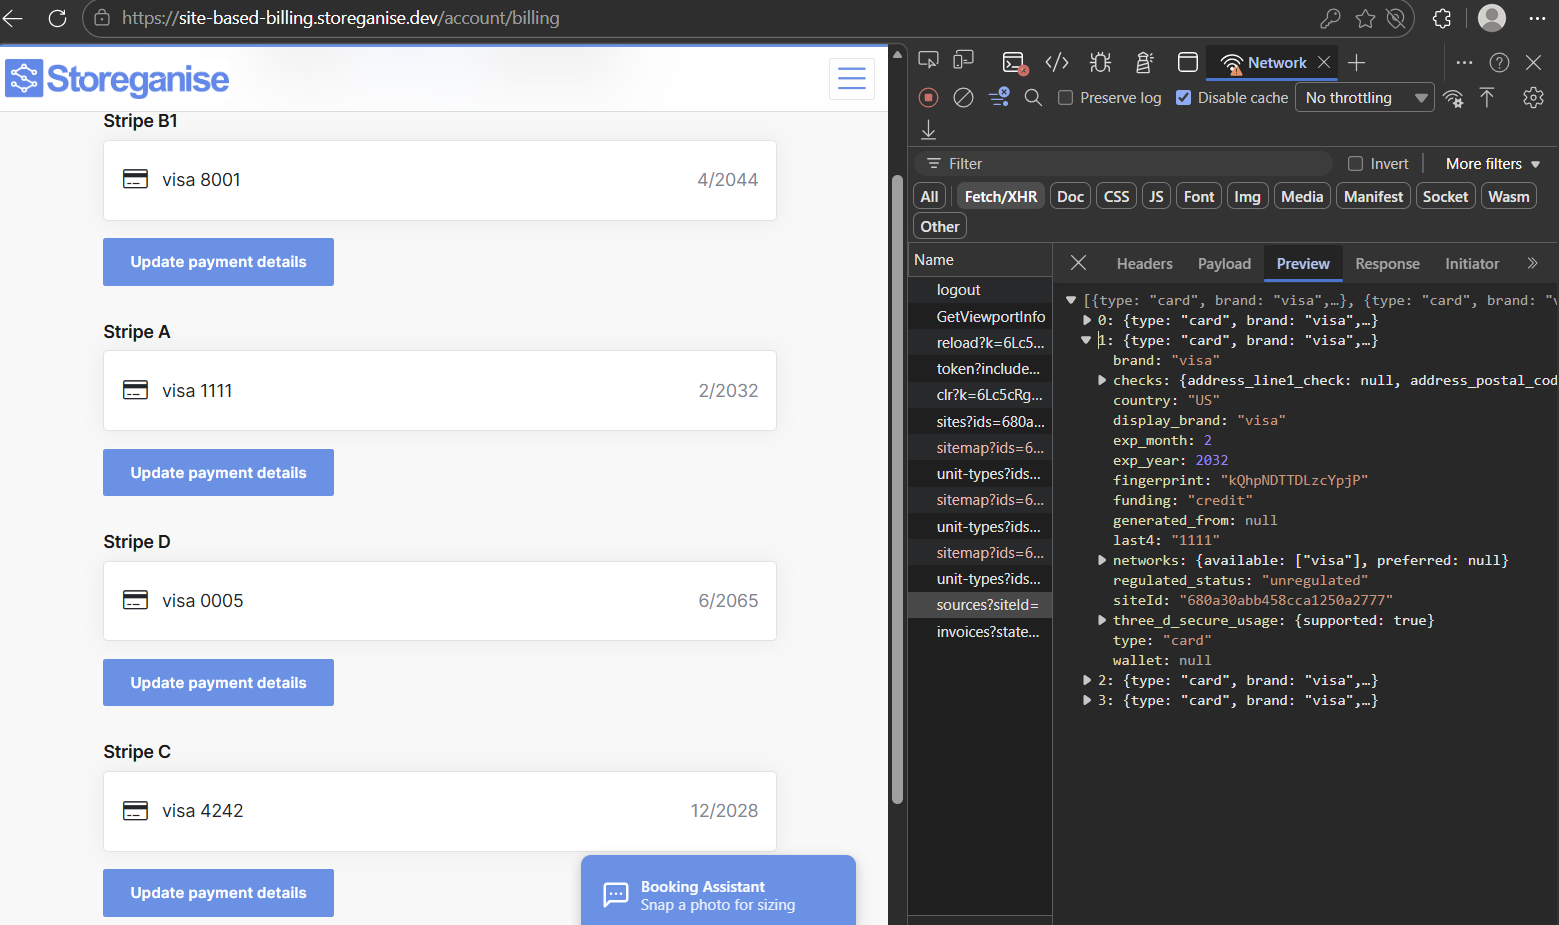
- Listing saved payment methods: fetch the customer's stored cards or bank accounts to display in your app's billing section.
Prerequisites
Before using the custom billing API, you need at least one billing Add-on installed and configured on your account. Add-ons can be set up at business level (shared across all sites) or site level (separate per site).Step 1: Register a payment method
To let a customer add a payment method, redirect them to the custom billing checkout URL. Storeganise renders the payment provider's hosted UI, captures and tokenises the payment details, then redirects the customer back to your app.Render a link or redirect programmatically to:https://{yourcompany}.storeganise.com/api/v1/billing/custom?siteId={siteId}&returnUrl={returnUrl}
| Parameter | Required | Description |
|---|---|---|
siteId | Required when Add-ons are installed at site level | The Storeganise site ID for the site the customer is registering a payment method for. When Add-ons are at business level only, this can be omitted. Checkout always resolves to a single Add-on (a site-level Add-on takes precedence over a business-level one), so — unlike listing payment methods — an empty string can't be used to aggregate across Add-ons here |
returnUrl | Optional | The URL in your app the customer is sent to after checkout completes. Pass this to return the customer to the page where the checkout flow was initiated. Must be URL-encoded. |
https://{yourcompany}.storeganise.com/api/v1/billing/custom?siteId=site_xyz&returnUrl=https%3A%2F%2Fapp.yourcompany.com%2Fbilling
returnUrl . The payment method is stored automatically — no further API call is needed to complete registration.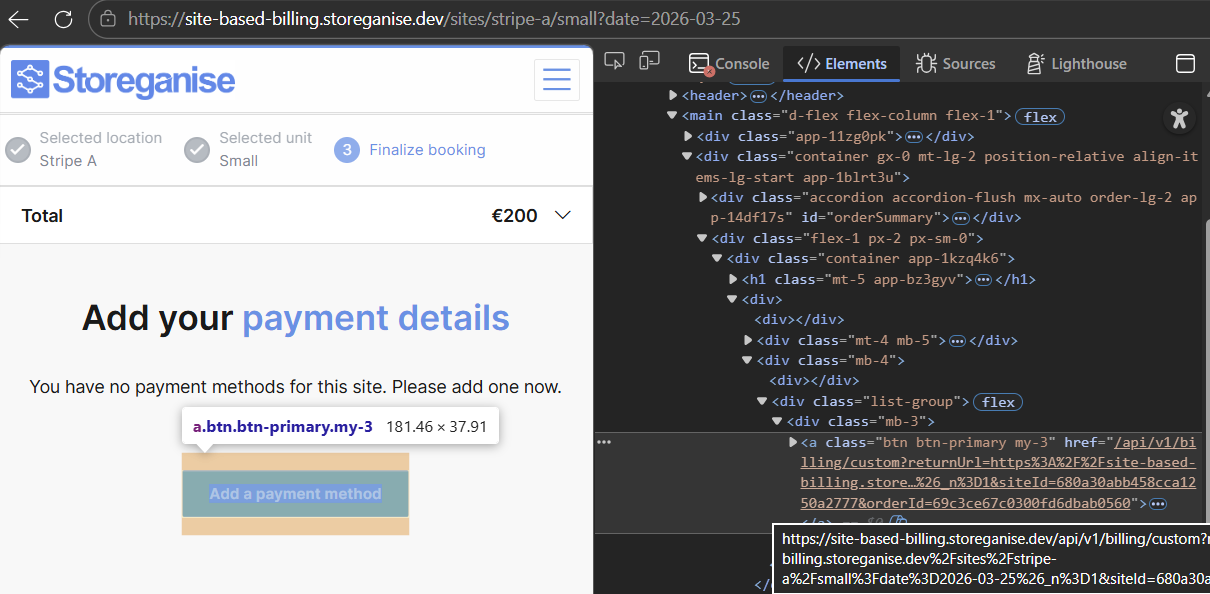
Authentication: /v1/billing/custom is an authenticated endpoint. Since this is a full-page redirect rather than a background API call, authentication relies on the customer's logged-in session cookie, which the browser sends automatically — so the customer must be signed in to your portal at the point they're redirected. You can't attach a Bearer token to a top-level browser redirect, and tokens or API keys must never be placed in the query string. (The /sources endpoint in Step 2 is a normal API call, so authenticate it with a Bearer token as shown.)
Step 2: List saved payment methods
To display a customer's stored payment methods in your app, call:GET https://{yourcompany}.storeganise.com/api/v1/billing/custom/sources?siteId={siteId}
| Parameter | Required | Description |
|---|---|---|
siteId | No | Filter results to payment methods registered for a specific site. Pass a valid site ID to target one site's Add-on. Pass an empty string to aggregate across all configured Add-ons at site and business level. When omitted, Storeganise falls back to the business-level Add-on. |
Note: Payment methods are scoped per Add-on. A customer who registers a payment method for one site will not see it when your app calls the API for a different site. Customers must register a payment method separately for each site they use.
GET https://{yourcompany}.storeganise.com/api/v1/billing/custom/sources?siteId=site_xyz
Authorization: Bearer {userToken}
[
  {
    "id": "src_abc123",
    "type": "card",
    "brand": "Visa",
    "last4": "4242",
    "expMonth": 12,
    "expYear": 2027
  }
]
id . Most include masked card or account details — such as last4 and brand — suitable for display in your UI.